Dear hop-loving friend, welcome back! Today’s topic will be complex, but fascinating.
Who said perfection can’t be achieved in a glass of craft beer? Are you ready to dive into the world of homebrewing, explore craft breweries and discover tasting kits that will transform your kitchen into a real brewery! Let’s explore the world of homemade beer together!
How to Make Craft Beer at Home
Producing craft beer has become an increasingly popular hobby in Italy, involving a large number of enthusiasts. With a few tools and the right guidance, homebrewing can become an exciting adventure. In this guide, we will reveal all the secrets on how to bring magic to life in your cauldron, what equipment is essential and how to choose the production method tailored for you. Follow our suggestions and transform yourself into true master brewers!
The homebrewing adventure begins with selecting equipment. If you opt for the malt extract technique, your journey begins with the purchase of the kit and the precious jar of extract. Instead, if your choice falls on all grain, be prepared to accumulate a vast range of technical information and equipment.
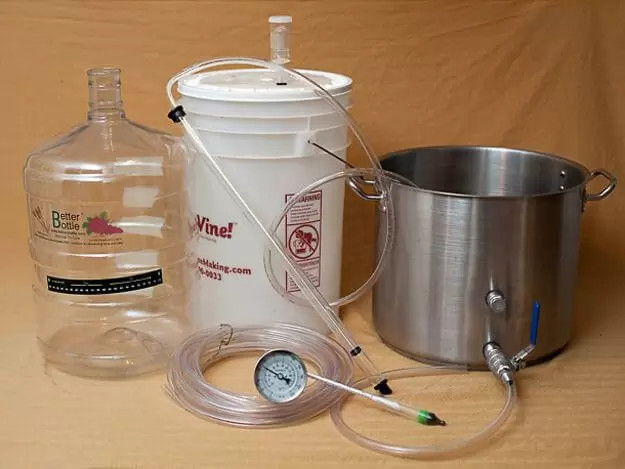
All grain equipment is extensive and requires considerable space for storage. Those who dedicate themselves to this technique often have spaces such as garages, cellars, terraces or gardens. Pots, a fermenter, a mill and a filter, just to name a few, cannot be missing.
Beer Production Methods
But what makes beer so special? It is a delicate fermented cereal, mainly barley, but also wheat, oats, corn, etc. In the magical brewing process, the brewer creates a grain infusion to extract the sugars. This brew, now called “wort”, is boiled with the addition of hops and fermented with yeast. Et voilà, the beer is served! There are several techniques for bringing this process into the home, some simple and others more complex. Let’s discover them together!
Homebrewing techniques
There are various techniques for making craft beer: Beer with the Kit and extract, All Grain Beer, and E+G Beer. Recently, the BIAB (brew in a bag) technique has simplified the All Grain process, reducing complexity and costs. There is no superior technique, each has its pros and cons. For newbies, the kit is a great starting point, with the ability to evolve to more advanced techniques as you gain experience.
Useful Links: [Insert quality links useful to the reader here.]
How much does it cost to make craft beer at home?
Immersing yourself in the world of craft beer has a variable cost, closely linked to the technique adopted. By opting for the extract technique, we are essentially tied to the costs of the kit, which vary between €35-40 for the basic models, up to €120 for the more advanced ones. The least expensive kits produce between 10 and 15 litres, while the most expensive ones produce up to 23 litres.
In addition to the kit, you need to purchase water and malt extract, the latter sometimes included in the kit. For each variety of beer desired, you will need a jar of extract, with an average cost between €15 and €25.
How much does it cost to make All Grain Beer
For those who choose the all grain route, as anticipated, costs increase. The basic equipment starts from €200, but can increase considerably based on the completeness and functionality of the system. Some homebrewers even spend close to €1,000.
By opting for all grain, it will be necessary to purchase the ingredients for each new creation. For a 20 liter batch, the cost of raw materials is around €40.
Ingredients for Making Beer at Home
Let’s now move on to the protagonists of our sparkling adventure: malt, water, hops and yeast. Beer is the result of the fermentation of barley malt, but it can be produced with various cereals such as barley, wheat, rice, oats, rye, and spelt, as long as they have a high “diastatic power”.
Water is a crucial ingredient; each style of beer requires its own type of water. Hops, the flower of a climbing plant, gives bitterness and aroma to beer. Finally, yeast transforms sugars into alcohol and other substances, enhancing the flavor of beer.
There are countless styles of beer, enriched with ingredients such as fruit, salt, and honey. The brewer’s creativity can really range, leading to the discovery of new and fascinating flavours!
Ready for the adventure? Arm yourself with passion, curiosity and a good tasting kit, and dive into the wonderful world of craft beer!
Creating Craft Beer with the Kit: A First Step into the World of Craft Breweries
The art of homebrewing is a passion that has captured many. One of the most accessible ways to immerse yourself in this world is to use the beer making kit. Here we’ll walk you through the essential steps to brewing your own craft beer at home, with an eye on breweries for those who want to explore further.
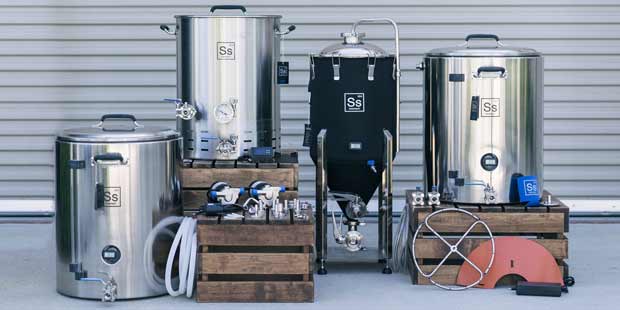
To start your adventure in the world of craft beer, you will need some essential tools such as pots of different sizes, a ladle, sanitizing solutions and of course, malt extract. In many cases, with a 1.8 kg jar of extract, you will be able to obtain 23 liters of delicious beer.
Procedure: The Secrets of a Craft Brewery at Your Home
Start by boiling the water, opting for bottled water to avoid unpleasant flavors. Immerse the jar of extract in another pot of water to make it more fluid. Don’t forget to clean and sanitize all the equipment, an essential step like in a real craft brewery.
The ground malt
Of course the first step would be to grind the malt, but doing it at home is a little complicated, right?
Luckily, we live in times where buying pre-milled malt is super easy!
You can find it in many stores specializing in homebrewing products, both physical and online. These stores offer a variety of milled malts of different types and flavors, so you’ll have the opportunity to experiment and find what you like for your craft beer recipe.
Additionally, many online platforms such as Amazon and eBay have a wide range of pre-milled malts. When you buy online, however, I advise you to carefully read the product descriptions and reviews of other users to ensure the quality of the malt.
Boiling and Oxygenation
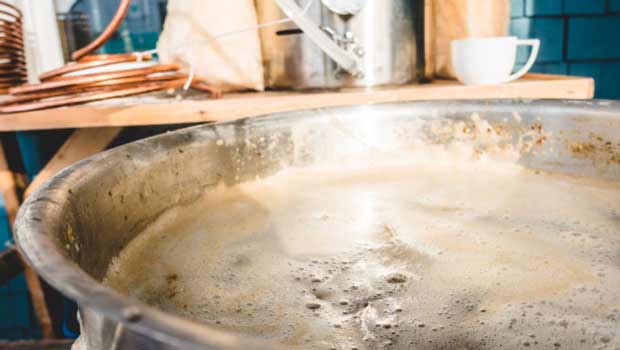
Once everything is clean, it’s time to boil. Although there are different opinions on the necessity of this step, a good boil is always recommended. After that, transfer the wort to the fermenter and add cold water. Make sure the temperature is optimal before proceeding with the oxygenation of the must, a crucial phase for the success of the fermentation.
Adding Yeast: The Heartbeat of Craft Beer
Once you reach your desired temperature, it’s time to add the yeast. There are various opinions on the importance of rehydrating yeast, but if you prefer to make your life easier, you can also add it directly. Once done, close the fermenter and insert the bubbler filled with a sanitizing solution or spirits such as gin or vodka.
This journey into homebrewing has given you a glimpse into the secrets of a craft brewery, preparing you to create delicious beers with your own tasting kit. Explore, experiment and, above all, have fun!
For further details and insights into the world of craft beer and advice on how to open a craft brewery.
Fermentation of Craft Beer
Within a few hours, your bubbler will begin to express vital signs, a clear indication that yeast activity is in full swing in the homebrewing process. However, if this does not happen, there is no reason to be alarmed! The causes could be various: a non-hermetic closure of the lid, which allows air to escape, or a non-optimal must temperature, ideally between 18 and 24 degrees.
If you encounter these problems, a solution may be to re-oxygenate the wort or, in extreme cases, add a new sachet of dry yeast. In any case, the art of craft beer requires patience and common sense! Let the must ferment for approximately 10-15 days, checking the density every 48 hours, until the desired value is reached. And remember, a few extra days in the fermenter won’t compromise your creation!
Decanting of craft beer
Once the ideal density has been reached, it is time for decanting. This step is essential to separate the beer from the accumulated yeast base, a recommended practice even if some tasting kits do not provide it. Sanitize all the equipment well and proceed calmly with the decanting, avoiding raising the yeast base.
Please note: it is essential to remove the bubbler before opening the fermenter tap to avoid inconveniences!
Priming: Adding Sugar to Craft Beer
Once the flow is complete, it’s time to add sugar, if called for in the recipe, for the priming process. This step is crucial to give the beer the right carbonation. You can consult posts and online guides specific to priming for further details and advice. Remember, it is also possible to add sugar directly into the bottles, using dispensers that calculate the right amount based on the size of the bottle.
Bottling of Craft Beer
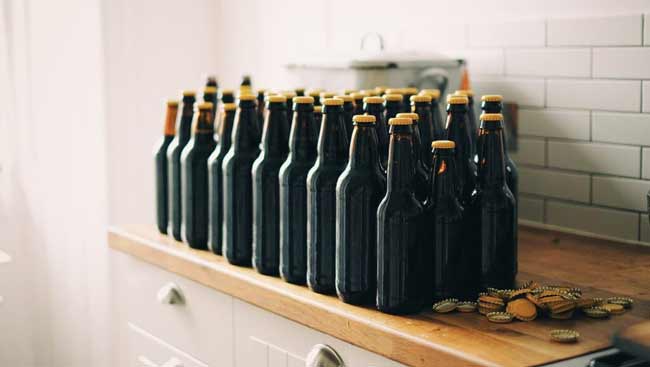
Before proceeding with bottling, it is essential that the bottles are perfectly clean and sanitized. Fill them leaving a few centimeters of space, essential for the decompression of the carbon dioxide, and cap them using the capper provided in the kit. Let them rest in a dark place at a temperature of 22-24° for about 15 days. This refermentation phase will allow the priming sugar to transform into carbon dioxide, making your beer deliciously fizzy!
Tasting Craft Beer
We understand, the temptation to taste your creation is almost irresistible! However, patience is key when it comes to craft brewing. The beer has not yet reached its stability, so don’t be discouraged if the flavor is not yet what you hoped for.
After 15 days of refermentation and, ideally, a further month in the fridge, your craft beer will be ready to be enjoyed. Don’t forget to explore various breweries and experiment with different tasting kits to discover new flavors and techniques!
Craft Beer: Producing it at Home with the All Grain Method
For craft beer enthusiasts looking for a more authentic and complex experience, switching to the All Grain method is essential. We present our guide dedicated to those who wish to make beer without a kit, immersing themselves in the world of homebrewing.
Tecniche All Grain: A Journey into the Art of Beer
The All Grain methodology may seem challenging, requiring time, passion, and a greater financial investment. However, the direct use of fundamental raw materials such as malt, water, hops and yeast, without resorting to pre-packaged extracts, faithfully reproduces the processes of craft breweries. The malt is ground and cooked in infusion following precise recipes, and then the resulting wort is filtered, boiled with hops, cooled and fermented.
This approach requires additional knowledge and tools, thus increasing the investment in equipment, but the result? A craft beer that fully expresses your creativity and passion.
Produzione E+G: The Balance between Kit and All Grain
E+G, or “Extract plus grains”, represents an interesting compromise between the kit and All Grain. It allows you to create a wort starting from a basic malt extract, to which special malts are added. These can give unique characteristics to the beer, such as a darker color or a biscuity flavor.
Organoleptic Characteristics: The Blank Canvas of Beer
The base malt extract acts as a blank canvas, allowing you to express your creativity. By adding special malts and varying hops, you can get surprisingly different results. The E+G technique requires a mill to grind the malts and a filter to infuse the hops.
Making Beer at Home: Is it Legal?
A legitimate doubt arises: is producing craft beer at home legal? The answer is absolutely yes! Since 1995, producing beer at home in Italy has been perfectly legal, as long as it is intended for self-consumption. For those who aspire to sell their creation, it is necessary to have a brewery and obtain the relevant hygiene and marketing permits.
So, armed with passion and tasting kit, immerse yourself in the wonderful world of craft beer. Happy homebrewing to everyone!

Visita il nostro e-shop e scopri tanti prodotti a prezzi vantaggiosi!